
Painted Sourdough Boule
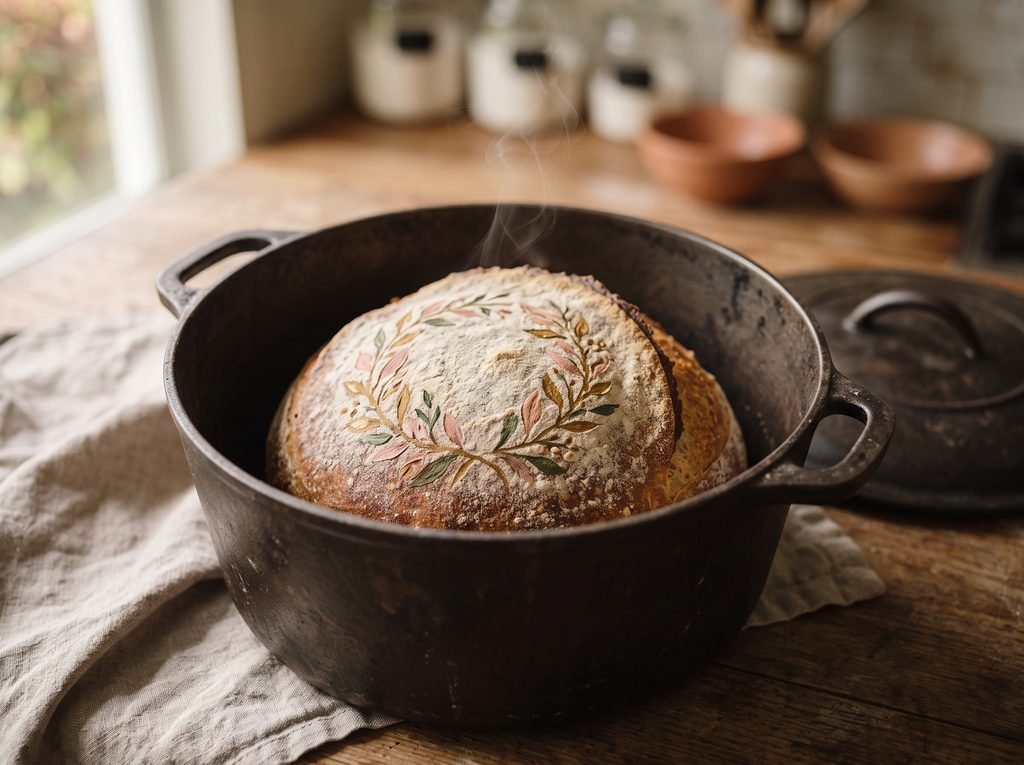
Painted sourdough is the rare baking trend that’s exactly as charming as it looks online — a simple wreath, a few branches, or loose brushstrokes, painted directly onto the dough in “paint” made from nothing more than pantry spices and water, then baked right in.
Underneath the design it’s an ordinary, reliable lean sourdough boule. The art happens in about five extra minutes right before it goes in the oven.
Why You’ll Love It
- A genuinely viral technique that’s much simpler than it looks — no special tools beyond a small brush
- “Paint” made entirely from pantry spices and water, nothing artificial
- A reliable, classic lean sourdough boule underneath the design
- Endlessly customizable — the same technique works for any design, any occasion
- A great first project if you’ve never tried decorative sourdough art before
Ingredients
Volume measurements are included for convenience, but they’re approximate — for the most consistent results, weigh your ingredients on a kitchen scale, especially the flour.
Dough
- Bread flour (450 g / 3¾ cups)
- Whole wheat flour (50 g / ⅓ cup + 1 Tbsp)
- Water, room temperature (365 g / 1½ cups)
- Active sourdough starter (100 g / ⅓ cup + 1 Tbsp)
- Fine sea salt (10 g / 1¾ tsp)
Natural Paint
- Beet powder (½ tsp): for pink/red
- Turmeric powder (½ tsp): for gold/yellow
- Activated charcoal powder (½ tsp): for black/grey
- Matcha powder (½ tsp): for green
- Water (4 tsp, about 1 tsp per color): to thin each powder into a paint
Equipment
- Kitchen scale
- Dutch oven, 5–6 quart
- Banneton (proofing basket) with cloth liner
- Small fine-tipped natural-bristle brush, food-safe and reserved for baking only
- Small bowls, for mixing the paint
- Lame or a very sharp, thin blade
Sample Schedule (2-Day)
Day 1
- Mix and autolyse 30 minutes
- Add starter and salt; knead 8–10 minutes
- Bulk ferment 4 hours with 3 sets of folds
- Shape into a round
- Place in the banneton, cover, and refrigerate overnight
Day 2
- Preheat the oven with the Dutch oven inside
- Flour the surface and mix the natural paints
- Paint the design and score
- Bake covered, then uncovered
- Cool at least 1 hour before slicing

Painted Sourdough Boule
Method
- In a large bowl, mix the bread flour, whole wheat flour, and water together by hand just until no dry flour remains. Cover and rest (autolyse) for 30 minutes.
- Add the starter and salt. Mix and knead until smooth and elastic, 8–10 minutes by hand or 6–7 minutes with a stand mixer.
- Cover and bulk ferment at room temperature for 4 hours, with 3 sets of stretch-and-folds in the first 2 hours. The dough should look puffy and about 50% risen.
- Turn the dough out and shape into a tight round. Place seam-side up in a well-floured banneton, cover, and refrigerate overnight (12–15 hours).
- The next day, preheat the oven to 475°F (245°C) with the Dutch oven inside for at least 30 minutes.
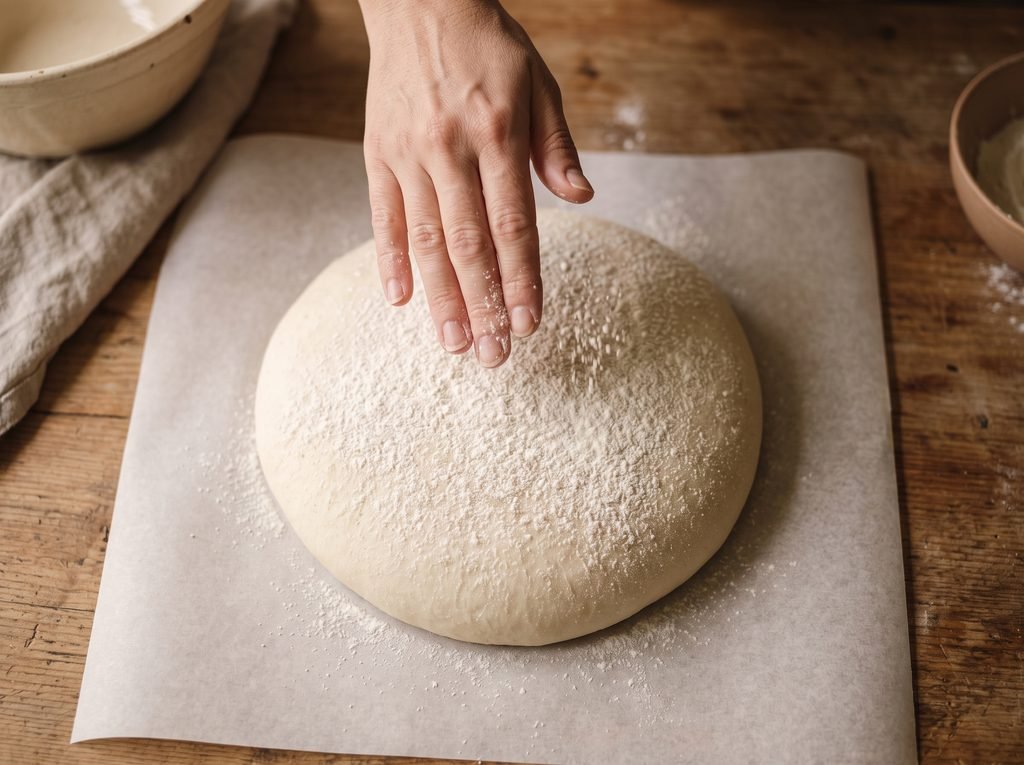
- Turn the cold dough out onto parchment paper. Dust the surface lightly and evenly with flour — this is your “canvas” and will help the paint show up crisply.
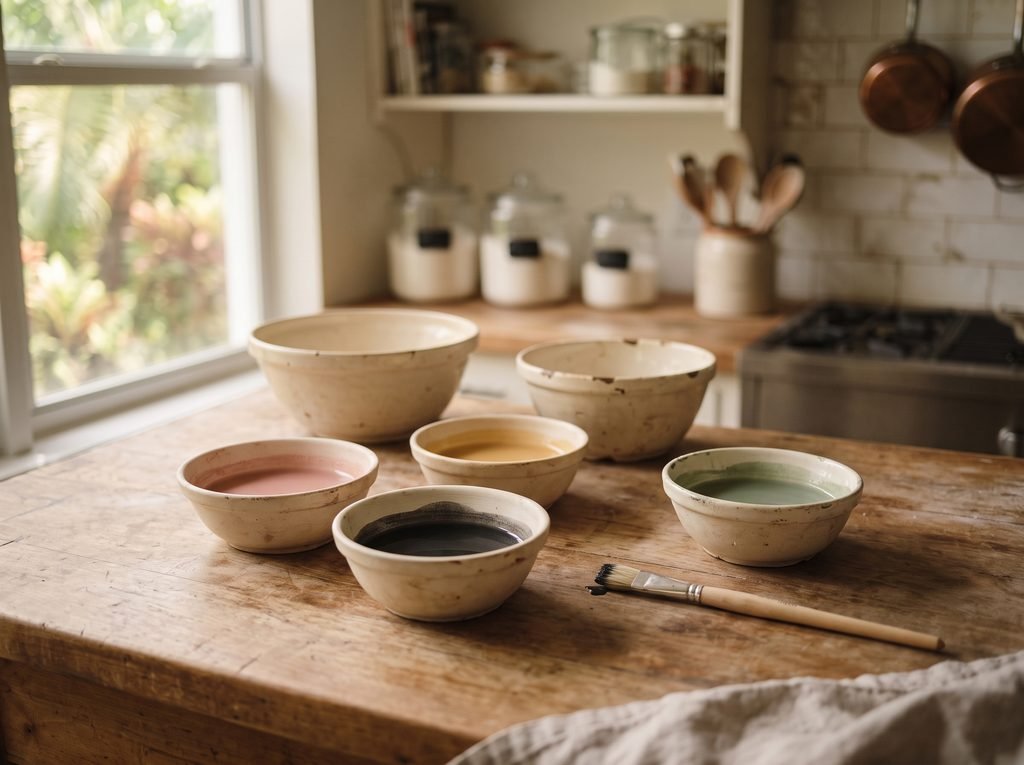
- Mix each natural paint color in its own small bowl, stirring about 1 teaspoon of water into each ½ teaspoon of powder until you have a watercolor-thin paint.
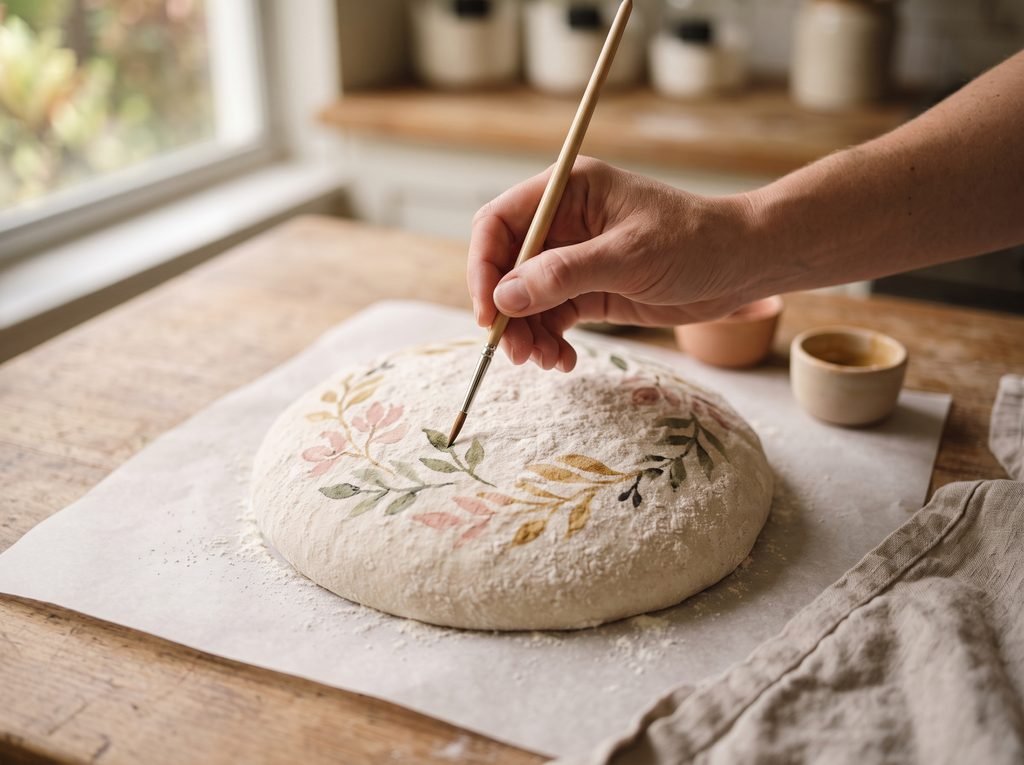
- Using the fine brush, paint a simple design onto the floured surface — a loose wreath of leaves, a few branches, or an abstract brushstroke pattern all work well. Keep it simple; detailed designs blur as the loaf bakes and expands.
- Score the loaf around or through the design as needed to let it expand evenly, then carefully lower the dough (on its parchment) into the hot Dutch oven, cover, and bake for 20 minutes.
- Remove the lid and bake another 20–25 minutes, until deeply golden and the design has set.
- Cool on a wire rack at least 1 hour before slicing.
Notes
Save This Recipe
Get it emailed to you now, plus new recipes as they go up.
Your email is safe with me. I’ll send this recipe straight over. No spam, ever—and you can unsubscribe anytime.
How to Make It
1Mix and autolyse. In a large bowl, mix the bread flour, whole wheat flour, and water together by hand just until no dry flour remains. Cover and rest (autolyse) for 30 minutes.
2Add starter and salt. Add the starter and salt. Mix and knead until smooth and elastic, 8–10 minutes by hand or 6–7 minutes with a stand mixer.
3Bulk ferment. Cover and bulk ferment at room temperature for 4 hours, with 3 sets of stretch-and-folds in the first 2 hours. The dough should look puffy and about 50% risen.
4Shape and refrigerate. Turn the dough out and shape into a tight round. Place seam-side up in a well-floured banneton, cover, and refrigerate overnight (12–15 hours).
5Preheat. The next day, preheat the oven to 475°F (245°C) with the Dutch oven inside for at least 30 minutes.
6Flour the canvas. Turn the cold dough out onto parchment paper. Dust the surface lightly and evenly with flour — this is your “canvas” and will help the paint show up crisply.
7Mix the paints. Mix each natural paint color in its own small bowl, stirring about 1 teaspoon of water into each ½ teaspoon of powder until you have a watercolor-thin paint.
8Paint the design. Using the fine brush, paint a simple design onto the floured surface — a loose wreath of leaves, a few branches, or an abstract brushstroke pattern all work well. Keep it simple; detailed designs blur as the loaf bakes and expands.
9Score and bake, covered. Score the loaf around or through the design as needed to let it expand evenly, then carefully lower the dough (on its parchment) into the hot Dutch oven, cover, and bake for 20 minutes.
10Bake, uncovered. Remove the lid and bake another 20–25 minutes, until deeply golden and the design has set.
11Cool. Cool on a wire rack at least 1 hour before slicing.
Tips & Troubleshooting
- Keep the design simple: fine details blur as the loaf expands and bakes — loose leaves, branches, or brushstrokes read far better than anything intricate.
- Flour the surface first: painting directly onto bare dough lets the color soak in and fade; a light, even dusting of flour gives the paint something to sit on top of.
- Keep the paint thin: it should be watercolor-thin, not a paste — too much powder and too little water can crack the crust as it dries.
- Score carefully around the design: a deflated loaf is almost always a scoring issue, not a painting one — see Why Did My Sourdough Deflate After Scoring? if yours falls flat.
- Reserve your brush for baking: keep a small brush set aside just for this so you’re not reaching for one that’s touched anything else.
How to Store
To store: in a paper bag or bread box at room temperature up to 4 days.
To freeze: slice first, then freeze in an airtight bag up to 3 months; toast slices straight from frozen.
Nutrition
Per slice, based on 12 slices per loaf. Estimated from the ingredients used — provided for convenience and not a substitute for a precise calculation.
140
Calories
27g
Carbs
5g
Protein
1g
Fat
1g
Fiber
190mg
Sodium
Desi’s Notes
The first time I painted a loaf I way overthought the design. A simple wreath of leaves or a few loose brushstrokes reads better on a baked, bloomed crust than anything fussy and detailed — the dough moves in the oven and fine lines blur.
Painting onto a light dusting of flour rather than directly onto bare dough is the single biggest trick here. The flour acts almost like a canvas and keeps the colors from just soaking in and disappearing.
This is “paint” made from pantry spices and a little water, nothing else — it’s genuinely just food, not a craft project that happens to be edible.
Before You Bake
Scaling this recipe up or down? Run your numbers through the Sourdough Calculator. And if you want a printable reference for troubleshooting your crumb and crust, grab the Crumb & Crust Diagnostic Quicksheet.
Knead to Know?
New recipes, baking tips, and sourdough troubleshooting — delivered before your starter even finishes its next rise.
Get the latest insights, no spam — just new recipes and baking tips. Unsubscribe anytime. See our Privacy Policy.

Tried this recipe? Leave a star rating below — it takes 10 seconds and helps other bakers decide what to make next.
Baked this recipe your way? Share it in Community Bakes and inspire other readers.