
Classic Sourdough Bagels
Bagels were the recipe that convinced me sourdough could do more than loaves. This dough comes together with active starter instead of discard, gets a touch of sweetness from cane sugar and maple syrup, and can go two directions once it’s shaped: bake the same day, or tuck the tray in the fridge and finish them tomorrow. Either way, you end up with that classic chewy, boiled-then-baked bagel, just built entirely around your starter’s own rhythm instead of a packet of yeast.
Why You’ll Love It
- A true boil-then-bake bagel, chewy outside and soft inside
- Built on active starter, so there’s no separate yeast step
- Flexible timing, bake the same day or finish them the next morning
- A little natural sweetness from cane sugar and maple syrup
- Makes a full dozen, and they freeze beautifully
Ingredients
Volume measurements are included for convenience, but they’re approximate – a kitchen scale will always get you a more consistent batch, especially for the flour.
- Filtered water (500 g / 2 cups + 2 Tbsp): lukewarm is fine. Skip the tap if it’s chlorinated, since that can work against your fermentation.
- Active sourdough starter (360 g / 1½ cups): it needs to be bubbly and active before you mix, not straight discard.
- Organic raw cane sugar (50 g / ¼ cup): adds a light sweetness and helps the crust color as the bagels boil and bake.
- Maple syrup (50 g / about 2½ Tbsp): mixed in alongside the sugar.
- High-protein bread flour, 12-14% protein (1150 g / about 9½ cups): I use and recommend Caputo Chef 00 flour, but any high-protein bread flour will work here. Every flour absorbs water a little differently, so keep an eye on hydration and fermentation timing if you switch.
- Fine sea salt (22 g / about 4 tsp): goes on top of the flour before mixing. Salt volume varies by brand, so weighing is worth it here.
- Honey (1 Tbsp): added to the boiling water, not the dough.
- Baking soda (1 Tbsp): also added to the boiling water.
- Shredded cheddar cheese (optional, if using): for cheddar cheese bagels, sprinkled on right after boiling.
- Everything bagel seasoning (optional, if using): for everything bagels, sprinkled on right after boiling.
- Italian seasoning (optional, about 1 Tbsp, if using): for Italian seasoning bagels, mixed into the dough in Step 3 rather than sprinkled on top.
Equipment
- Stand mixer: makes quick work of the mixing, though this dough can absolutely be kneaded by hand if you don’t have one.
- Kitchen scale: for measuring both the dough and the 12 portions evenly.
- Bench scraper or a sharp knife: for dividing the dough into 12 pieces.
- Parchment paper, cut into 6-inch squares: each shaped bagel rests on its own square, which makes moving it into the boiling water easy and mess-free.
- Large pot: for boiling the bagels in water with honey and baking soda.
- Baking sheet lined with parchment paper: for the bagels once they come out of the pot.
- Shower cap or a reusable bowl cover: keeps the dough from drying out at every resting stage.
- Covered container: needed if you’re proofing the shaped bagels overnight in the fridge.
- Wide, shallow slotted strainer: a metal spider strainer or slotted spoon for lifting the bagels out of the boiling water. It lets the excess water drain right back into the pot instead of pooling on the baking sheet.
Sample Schedule
Dough Day
- Mix the water and starter until dissolved
- Mix in the sugar and maple syrup
- Add the flour, then the salt, and mix until just incorporated
- Knead by hand about 1 minute, until smooth
- Rest, covered, 1 hour
- Knead again for about 2 minutes
- Bulk ferment until risen about 50%, about 4 hours in a warm kitchen, longer in a cooler one
- Divide into 12 portions (about 175-177 g each) and pre-shape into rounds
- Rest, covered, 20 minutes
- Shape into bagels and set each on a parchment square
Path A: Bake the Same Day
- Let the shaped bagels rise at room temperature 1-2 hours, until risen about 50%
- Move straight into boiling and baking
Path B: Bake the Next Day
- Transfer the shaped bagels to a covered container and refrigerate overnight
- The next day, let them sit out 1-2 hours, until risen about 50%
- Move straight into boiling and baking
Boil & Bake
- Bring a large pot of water to a boil with 1 Tbsp honey and 1 Tbsp baking soda
- Boil each bagel 30 seconds per side, using a strainer to flip and lift them out
- Arrange boiled bagels on a parchment-lined baking sheet
- Preheat oven to 425°F
- Bake 17-18 minutes
- Cool on a rack at least 1 hour before slicing

Classic Sourdough Bagels
Method
- Mix the water and starter until dissolved, then mix in the sugar and maple syrup.
- Add the flour, then the salt, and mix until just incorporated. For Italian seasoning bagels, add about 1 Tbsp Italian seasoning here too.
- Knead by hand about 1 minute, until smooth. Cover and rest 1 hour.
- Knead again for about 2 minutes, cover, and bulk ferment until risen about 50% (roughly 4-8 hours, depending on your kitchen).
- Divide into 12 portions (about 175-177 g each) and pre-shape into tight rounds. Rest, covered, 20 minutes.
- Shape each round into a bagel and set on a parchment square.
- Either let rise at room temperature 1-2 hours until about 50% risen, or refrigerate overnight in a covered container and rise 1-2 hours the next day.
- Boil a large pot of water with 1 Tbsp honey and 1 Tbsp baking soda. Boil each bagel 30 seconds per side, using a strainer to flip and lift them out.
- Arrange boiled bagels on a parchment-lined baking sheet, sprinkling with cheddar or everything seasoning now if using, while still wet. Preheat oven to 425°F and bake 17-18 minutes.
- Cool on a rack at least 1 hour before slicing.
Notes
Save This Recipe
Get it emailed to you now, plus new recipes as they go up.
Your email is safe with me. I’ll send this recipe straight over. No spam, ever—and you can unsubscribe anytime.
How to Make It
1Dissolve the starter. In the bowl of a stand mixer, combine the filtered water and active sourdough starter. Mix or stir until the starter is fully dissolved into the water.
2Add the sweeteners. Add the cane sugar and maple syrup and mix until both are dissolved into the liquid.
3Add the flour and salt. Measure the flour into the bowl, then add the salt on top. Mix with the dough hook until everything is incorporated, it doesn’t need long, just enough for the flour and salt to come together with the wet ingredients. If you’re making Italian seasoning bagels, add about 1 tablespoon of Italian seasoning here too, along with the flour and salt.
4Knead briefly. Turn the dough out and knead it by hand for about a minute, just until it’s smooth. This dough doesn’t need an extended knead at this stage.
5First rest. Return the dough to the bowl, cover it so it can’t dry out, and let it rest on the counter for about an hour. This gives the gluten a chance to start relaxing and developing.
6Knead again. Turn the dough out and knead for another two minutes or so. You’ll notice it’s smoothed out considerably compared to before, the rough, bumpy texture from the first knead should be gone.
7Bulk ferment. Return the dough to the bowl, cover, and let it ferment on the counter. Fermentation actually started the moment the starter went into the water, so watch the dough rather than the clock, you’re looking for about 50% risen. That took roughly 4 hours in my kitchen; a cooler kitchen can take 6 to 8.
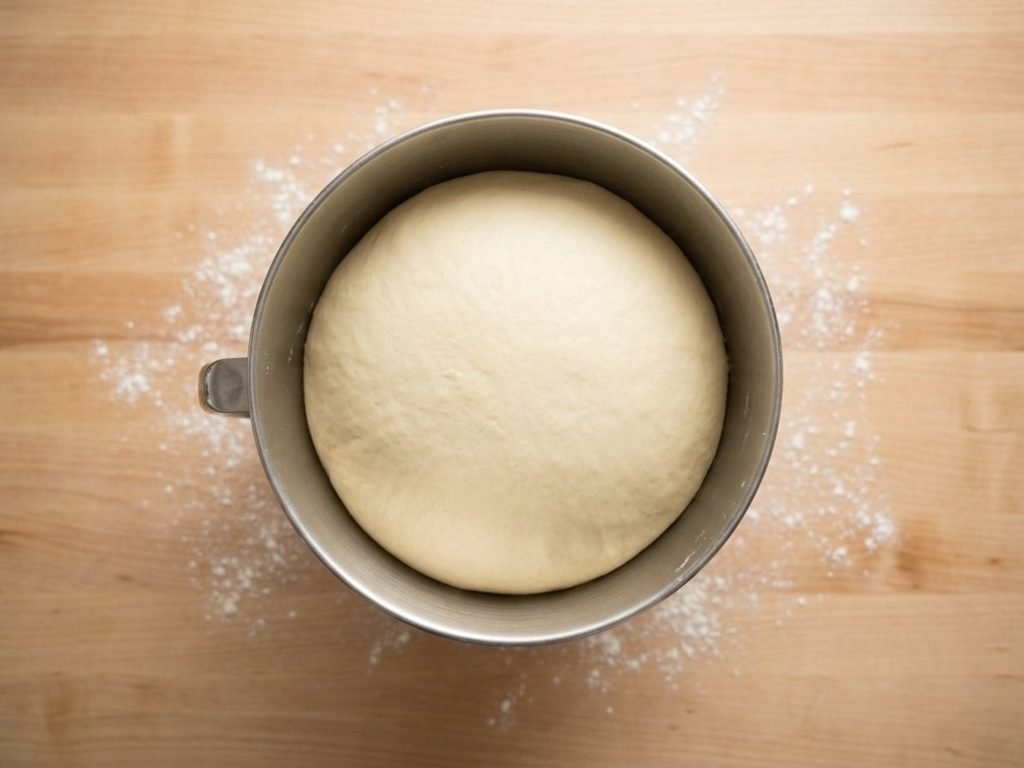
8Divide. Once the dough has risen about 50%, turn it out and divide it into 12 pieces using a scale and a bench scraper or sharp knife. Each portion should land around 175 to 177 grams.
9Pre-shape into rounds. Working with one piece at a time, spread it out and press it down with your palm, then fold the outer edges in toward the center, working your way around so the bottom stretches taut while the top gathers in. Flip the piece over, cup it with your hand against the counter, and drag it toward yourself to build surface tension into a tight little ball. Repeat with all 12 pieces, then cover them so they don’t dry out and let them rest for 20 minutes.
10Shape into bagels. Take one dough ball and press your finger through the center to punch a hole. Using your two index fingers, gently stretch that opening outward until you have a recognizable bagel shape. Set the shaped bagel on its own 6-inch parchment square, this makes it easy to lower into the boiling water later without it sticking to anything. Repeat with the rest of the dough balls.
11Choose your timing. If you’re baking today, let the shaped bagels rise at room temperature for 1 to 2 hours, watching for about 50% rise, don’t let them go further than that or you’ll lose the oven spring. If you’re baking tomorrow, place the shaped bagels in a covered container and refrigerate them overnight without letting them rise first, the cold will slow things down but fermentation continues, so check them the next day and let them sit out for 1 to 2 hours (less in a warm kitchen, more in a cool one) until they’ve reached that same 50% mark.
12Boil. Fill a large pot with water, add a spoon of honey and a spoon of baking soda, and bring it to a boil. Working one bagel at a time, boil each for 30 seconds per side, using a wide, shallow strainer to flip it and then lift it out, letting the excess water drain back into the pot.
13Bake. As each bagel comes out of the water, set it on a parchment-lined baking sheet. If you’re making cheddar cheese or everything bagels, sprinkle the cheese or everything seasoning over the top right then, while the bagel is still wet from boiling, that’s what helps it stick. Once they’re all boiled and lined up, preheat the oven to 425°F and bake for about 17 to 18 minutes. Watch them near the end, you’re looking for the same internal doneness as a loaf, around 205 to 210°F, and a deep golden color. Leave them a minute or two longer if you like a darker crust.
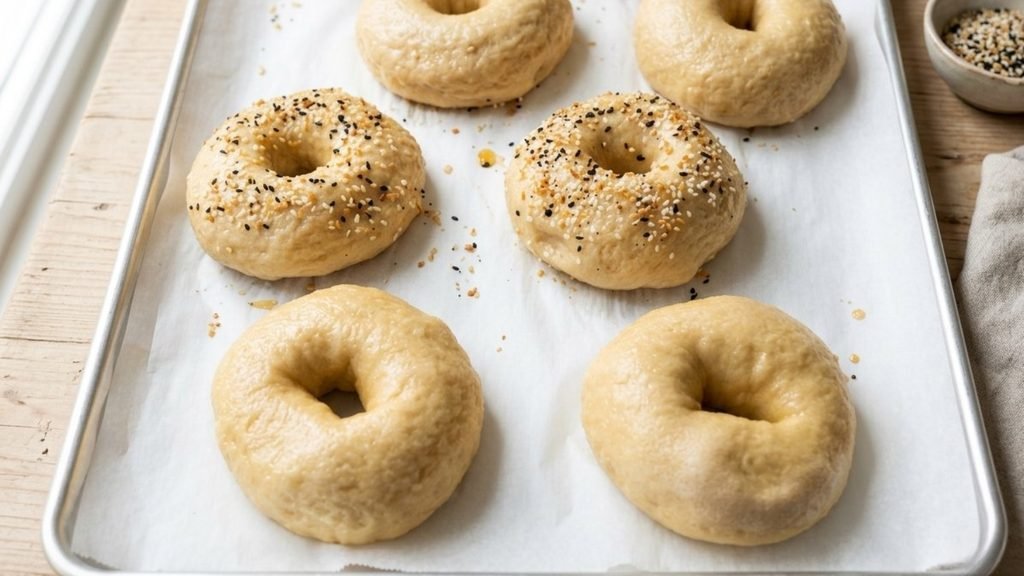
14Cool. Move the bagels to a cooling rack for at least an hour before eating. They can be sliced warm if you’re in a hurry, but the inside will be a little wet and sticky until they’ve fully cooled, so waiting is worth it.


Tips & Troubleshooting
- No stand mixer: this dough kneads by hand just fine, it just takes a little more elbow grease at the mixing stage.
- Watch the rise, not the clock: at every stage, from bulk fermentation to the final proof, you’re targeting about 50% risen. Kitchen temperature will move your timing more than any recipe can predict.
- Overnight in the fridge: fermentation slows down in the cold but doesn’t stop, so check the bagels before assuming they need the full 1 to 2 hours out of the fridge.
- Darker crust: leave the bagels in the oven a minute or two past 18 minutes if you like more color.
How to Store
To store: keep out whatever you’ll eat that day at room temperature.
To freeze (my real recommendation): freeze the rest the same day you bake them, that’s what keeps them tasting freshly baked once thawed. Slice before freezing or wait until they’ve thawed to slice, whichever is easier for you.
Bagel Toppings
This base dough takes well to add-ins. Wet toppings go on right after boiling, dry ones get worked into the dough itself, here’s how I do my three favorites.
Cheddar cheese bagels: boil the bagel as directed, 30 seconds per side, then set it on the parchment-lined baking sheet while it’s still wet. Sprinkle shredded cheddar over the top right then, the moisture on the surface is what helps it stick before it goes into the oven.
Everything bagels: same approach as the cheese, sprinkle your everything bagel seasoning over the top immediately after boiling, while the bagel is still wet, then bake as directed.
Italian seasoning bagels: dried herbs work differently. It’s not that they can’t stick to the wet surface after boiling, it’s that they’d scorch sitting on top through 17-18 minutes at 425°F. Mixing them into the dough instead keeps them safe from the oven and gives the whole bagel a deeper flavor all the way through. Add about 1 tablespoon of Italian seasoning right when you add the flour and salt in Step 3, then mix everything together as usual. This is the one topping that goes in at the start rather than after boiling.
Nutrition
Nutrition is estimated based on the ingredients used and a 12-bagel batch. It’s provided for convenience and isn’t a substitute for a precise calculation.
410
CALORIES
88
CARBS (G)
11
PROTEIN (G)
1
FAT (G)
3
FIBER (G)
700
SODIUM (MG)
Desi’s Notes
This dough runs on the same rule as my sourdough loaves: watch the rise, not the clock. In my kitchen the bulk ferment takes about 4 hours, but if your kitchen runs cooler, give it 6 to 8. You’re always looking for about 50% risen, at every stage, not a specific number on a timer.
The shaping motion is the same tension-building drag I use on my bread dough, just scaled down. Cup the small ball with your hand and pull it toward you against the counter until the surface goes smooth and tight.
If you’re not baking the same day, shape the bagels, cover them, and go straight into the fridge without letting them rise first. You don’t want them fermenting further before that cold rest even starts, or they’ll be over-proofed by the time you’re ready to bake.
Before You Bake
Scaling this recipe up or down? Run your numbers through the Sourdough Calculator. And if you want a printable reference for troubleshooting or timing, browse all six Printable Quicksheets.
Knead to Know?
New recipes, baking tips, and sourdough troubleshooting — delivered before your starter even finishes its next rise.
Get the latest insights, no spam — just new recipes and baking tips. Unsubscribe anytime. See our Privacy Policy.


Tried this recipe? Leave a star rating below — it takes 10 seconds and helps other bakers decide what to make next.
Baked this recipe your way? Share it in Community Bakes and inspire other readers.