
Sourdough Focaccia with Four Toppings
This one starts from the same base as my ciabatta, an 80% hydration dough built with coil folds, but the fermentation and the finish are completely different. Here, I let the dough go further, an overnight cold rise followed by a long, warm counter proof the next day until it’s noticeably over-risen. That extra fermentation is exactly what gives focaccia its big, irregular bubbles and that deeply dimpled top once the toppings go on.
Why You’ll Love It
- Big, irregular air pockets from a deliberately long, warm proof
- Same simple dough as the ciabatta, different finish
- Four topping combinations to choose from, or make it your own
- Works in a deep baking dish or portioned into muffin tins
- Freezes well, toppings and all
Ingredients & Equipment
Volume measurements are included for convenience, but they’re approximate – a kitchen scale will always get you a more consistent dough, especially for the flour.
Dough
- Active sourdough starter (120 g): bubbly and at its peak before you begin
- Water (400 g): the same 80% hydration as the ciabatta dough
- High-protein bread flour, 12-14% protein (500 g): Caputo Chef 00 or a similar high-protein flour works well
- Fine sea salt (11 g): mixed in after the first half of the flour
Toppings, Pick Your Favorite
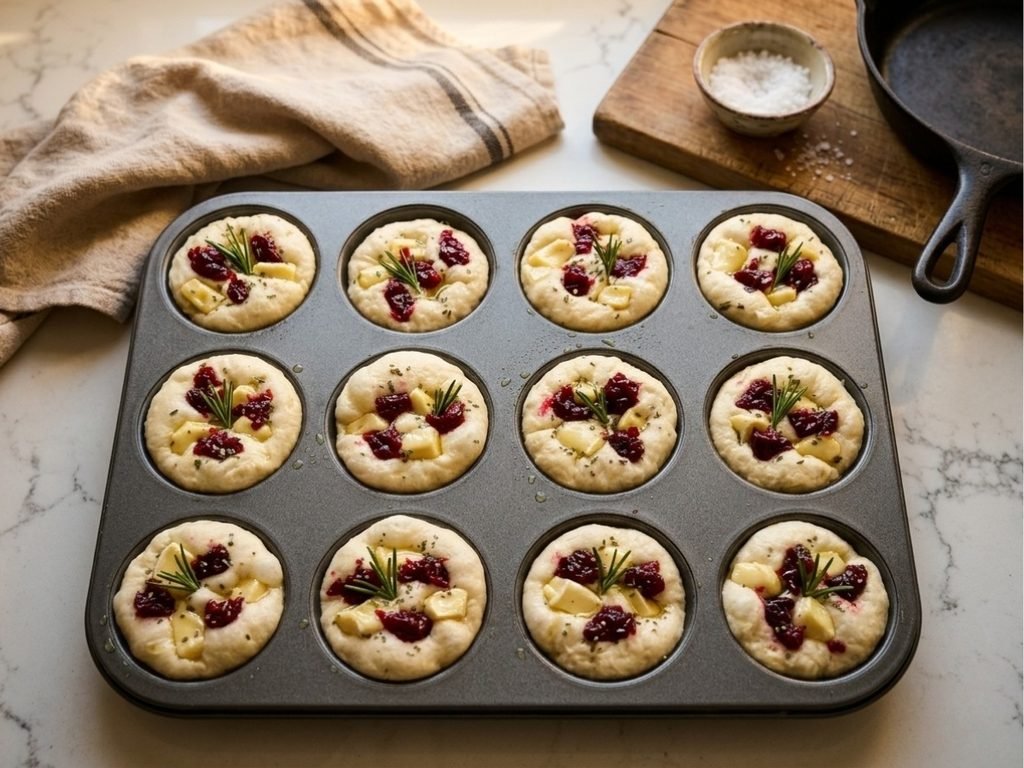
- Cranberry jam (homemade), brie cheese, and rosemary
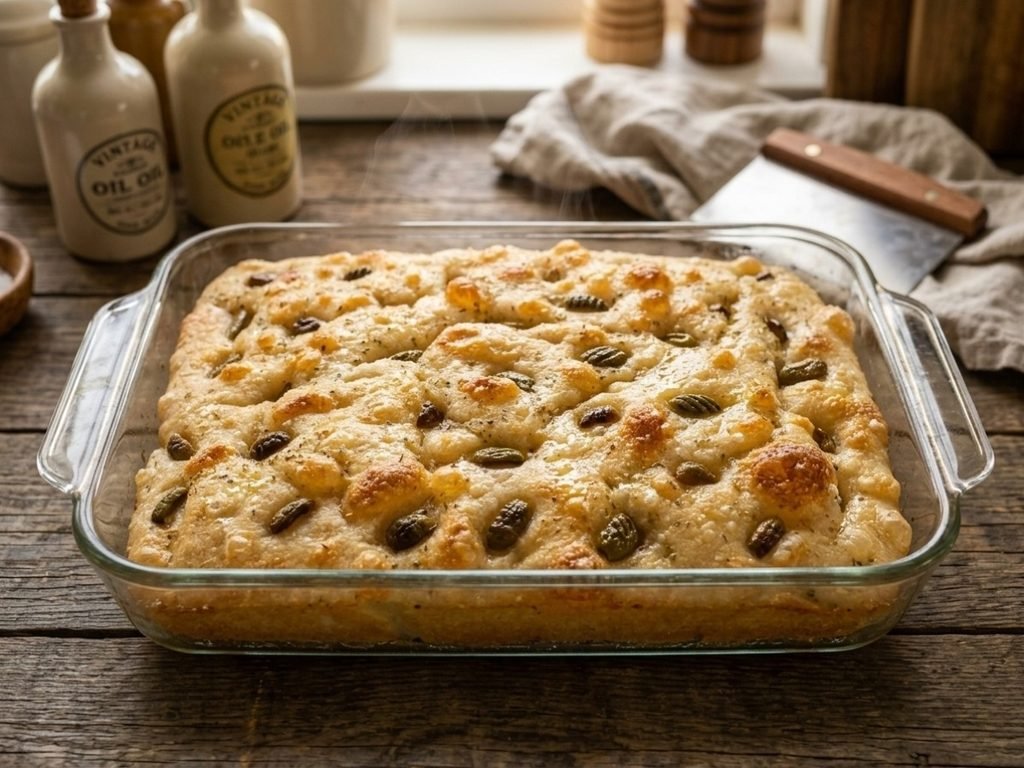
- Olives, rosemary, and olive oil
- Garlic, rosemary, olive oil, and flaky sea salt
- Feta cheese, sun-dried tomatoes, and Italian seasoning
Equipment
- Large mixing bowl: for mixing and for the coil fold stage
- Bread whisk or sturdy mixing spoon: whatever you use to stir the dough together
- Shower cap or reusable bowl cover: keeps the dough from drying out while it rests
- Square or rectangular glass baking dish: the dough ferments here from the start, right through its overnight rest in the fridge
- Deep baking dish, for the final bake: metal or ceramic works well, a nonstick metal pan is a good go-to for a clean release
- Muffin tin (optional): a large or medium tin works well for a portioned, extra-crunchy version, good for a breakfast-sized piece
Sample Schedule (2-Day)
Day 1
- Dissolve the starter into the water and mix well
- Add half the flour and mix, then add the salt and the rest of the flour, mix well
- Cover and set aside for 30 minutes
- Do 4 rounds of coil folds, 30 minutes apart
- Move the dough into a glass baking dish or divide and place into a muffin tin and let it rise about 50%
- Cover and refrigerate overnight
Day 2
- Take the dish out and let it sit on the counter for several hours, until the dough has more than doubled
- Preheat the oven to 450°F
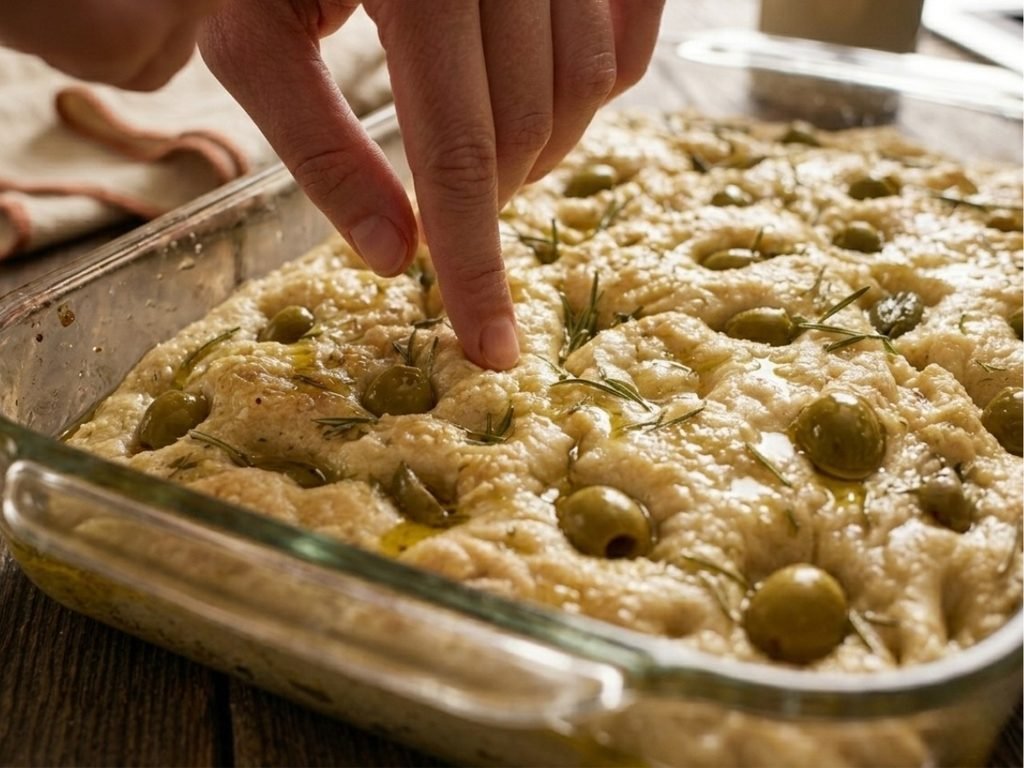
- Spread your toppings over the dough and press them in with your fingers, dimpling all the way down
- Bake 25-30 minutes, watching closely since ovens vary
- Let it cool on a rack before cutting in

Sourdough Focaccia with Four Toppings
Method
- Dissolve the starter. In a large bowl, dissolve the active starter into the water and mix well.
- Mix in the flour and salt. Mix in half of the flour first. Once that’s combined, add the salt along with the remaining flour and stir until it comes together. At 80% hydration, expect a loose, wiggly texture rather than anything stiff.
- Rest. Cover the bowl and set it aside for half an hour before the first fold.
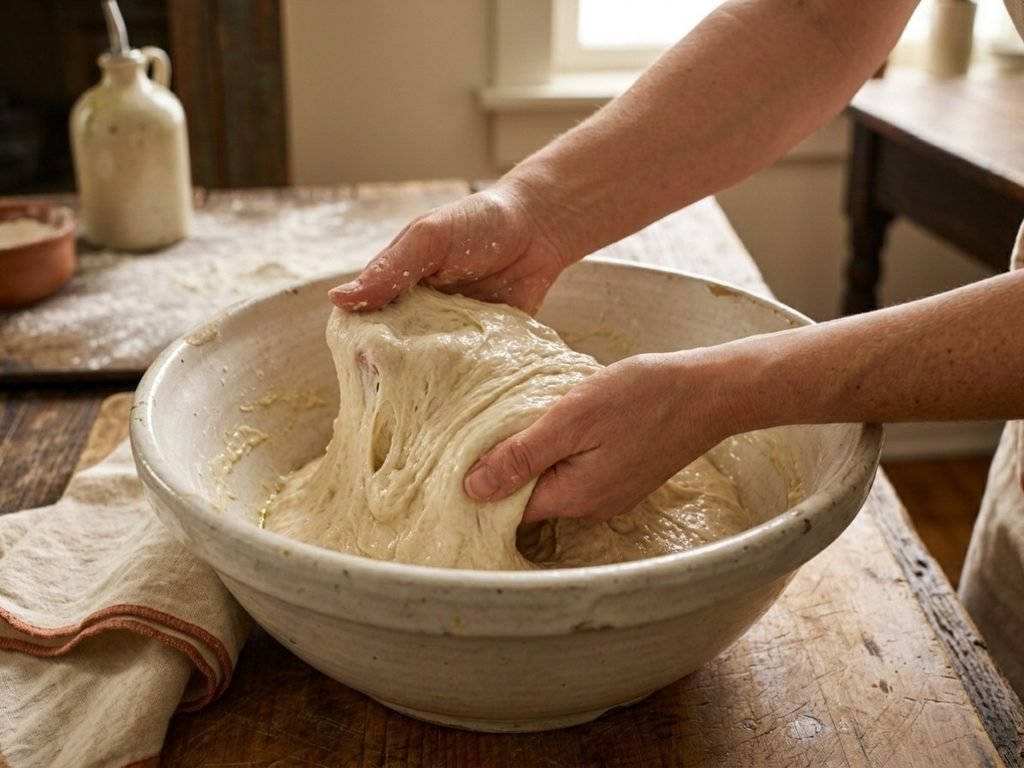
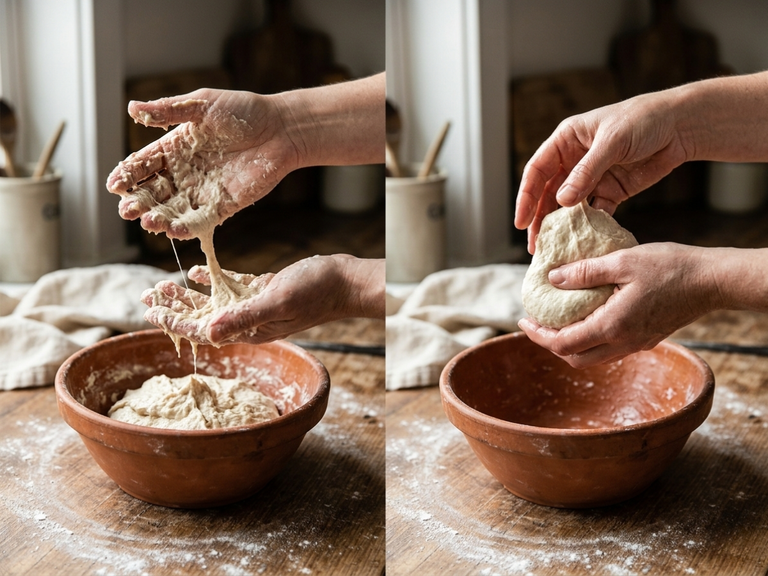
- Coil fold. Slide both hands underneath the dough from the center, lift it, and let it fold under itself, then turn the bowl and repeat the motion around the edges. Cover the bowl again and give it another half hour before the next round. Work through 4 rounds total, spaced 30 minutes apart.
- First rise and overnight cold proof. Move the dough into a square or rectangular glass baking dish, or divide and place into a muffin tin. Let it rise until it’s about 50% bigger, then cover and place it in the fridge overnight.
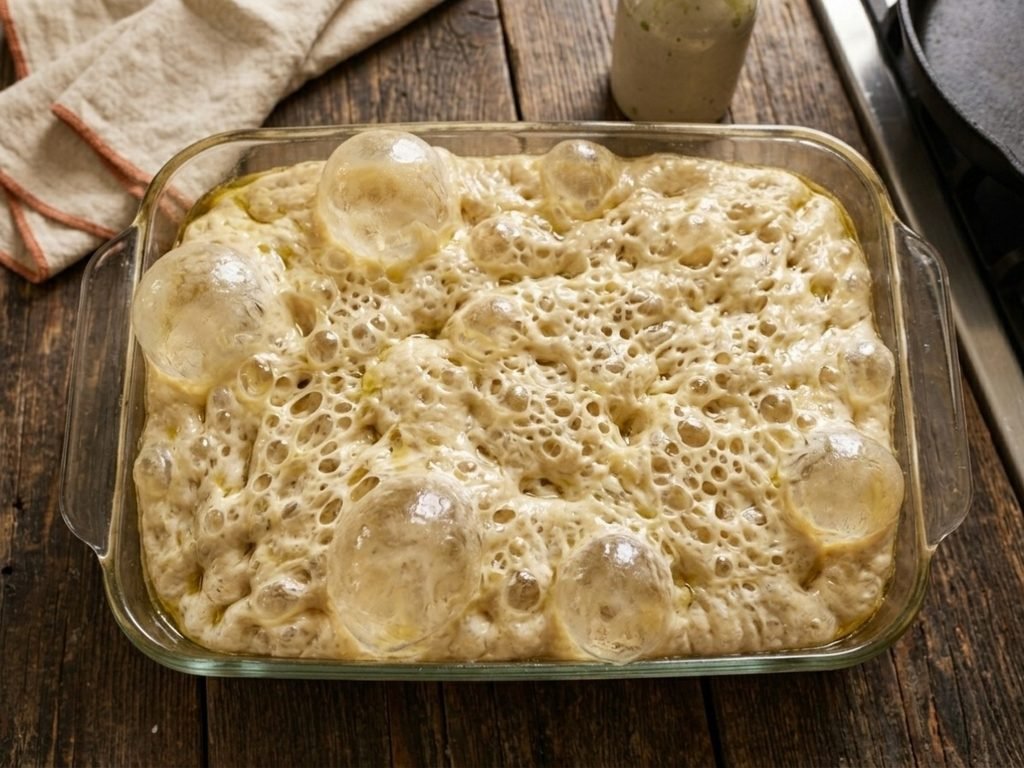
- Warm counter proof. The next day, take the dish out of the fridge and leave it on the counter for several hours, until the dough has more than doubled. This is a longer, warmer proof than most other doughs, and it’s what gives focaccia its big, open bubbles – don’t rush it.
- Preheat. Once the dough has over-risen, preheat your oven to 450°F.
- Top and dimple. Spread your chosen toppings evenly over the surface of the dough. Using your fingers, press down firmly all over the dough, working the toppings in as you go. You’ll see the dough shift and bubble underneath your fingers as the fermentation gases move around – that’s exactly the texture you’re after.
- Bake. Bake at 450°F for about 25 to 30 minutes, keeping an eye on it since ovens vary quite a bit here. Pull it earlier for a softer middle, or let it go the full time if you like a crunchier top and edges.
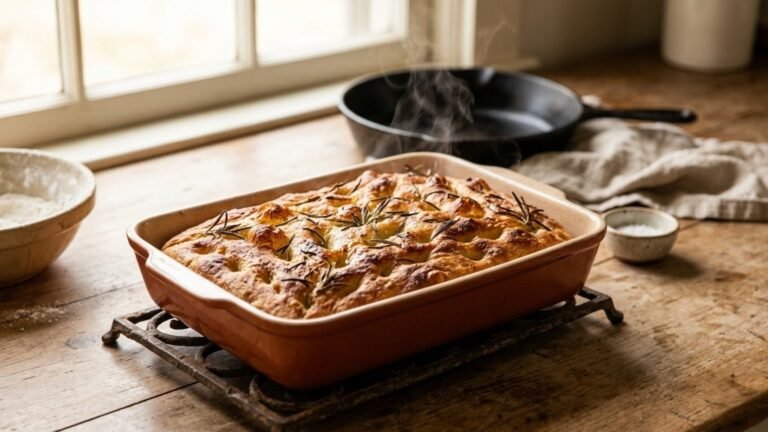
- Cool. Remove the focaccia from the baking dish and move it to a cooling rack. Let it cool before slicing into whatever pieces you’re planning to eat.
Video
Notes
Save This Recipe
Get it emailed to you now, plus new recipes as they go up.
Your email is safe with me. I’ll send this recipe straight over. No spam, ever—and you can unsubscribe anytime.
How to Make It
1Dissolve the starter. In a large bowl, dissolve the active starter into the water and mix well.
2Mix in the flour and salt. Mix in half of the flour first. Once that’s combined, add the salt along with the remaining flour and stir until it comes together. At 80% hydration, expect a loose, wiggly texture rather than anything stiff.
3Rest. Cover the bowl and set it aside for half an hour before the first fold.
4Coil fold. Slide both hands underneath the dough from the center, lift it, and let it fold under itself, then turn the bowl and repeat the motion around the edges. Cover the bowl again and give it another half hour before the next round. Work through 4 rounds total, spaced 30 minutes apart.
5First rise and overnight cold proof. Move the dough into a square or rectangular glass baking dish, or divide and place into a muffin tin. Let it rise until it’s about 50% bigger, then cover and place it in the fridge overnight.
6Warm counter proof. The next day, take the dish out of the fridge and leave it on the counter for several hours, until the dough has more than doubled. This is a longer, warmer proof than most other doughs, and it’s what gives focaccia its big, open bubbles – don’t rush it.
7Preheat. Once the dough has over-risen, preheat your oven to 450°F.
8Top and dimple. Spread your chosen toppings evenly over the surface of the dough. Using your fingers, press down firmly all over the dough, working the toppings in as you go. You’ll see the dough shift and bubble underneath your fingers as the fermentation gases move around – that’s exactly the texture you’re after.
9Bake. Bake at 450°F for about 25 to 30 minutes, keeping an eye on it since ovens vary quite a bit here. Pull it earlier for a softer middle, or let it go the full time if you like a crunchier top and edges.
10Cool. Remove the focaccia from the baking dish and move it to a cooling rack. Let it cool before slicing into whatever pieces you’re planning to eat.

Focaccia Toppings
All of these go on right before baking, spread over the top and pressed in as you dimple the dough. Here are four combinations to come back to:
- Cranberry jam (homemade) with brie cheese and rosemary
- Olives, rosemary, and a generous drizzle of olive oil
- Garlic, rosemary, olive oil, and flaky sea salt
- Feta cheese, sun-dried tomatoes, and a little Italian seasoning
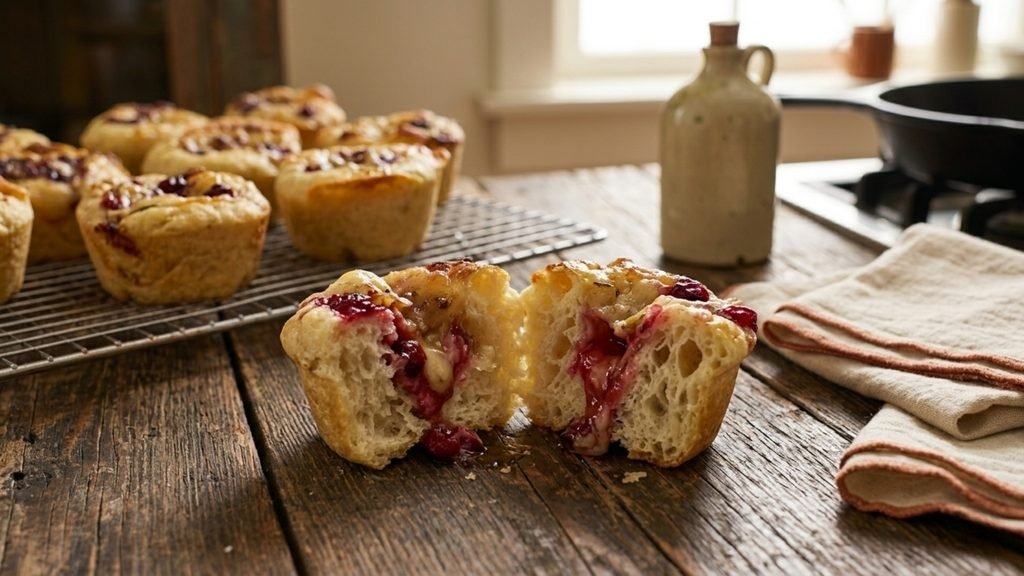
The cranberry, brie, and rosemary combination is especially good baked in a muffin tin instead of a baking dish – a large or medium tin gives you smaller, extra-crunchy portions that work well as a breakfast piece.
Tips & Troubleshooting
- Not bubbly enough on top: check how long you let the counter proof go the next day – this dough needs to more than double before it’s ready, don’t pull it too early.
- Warm kitchens move faster: if your kitchen runs hot, keep an eye on the counter proof rather than going strictly by the clock.
- Bake time varies by oven: 25-30 minutes is the typical range, but watch for the color and crunch you like rather than the clock alone.
- Muffin tin version: works especially well with the cranberry, brie, and rosemary topping, and gives you more crunch per piece.
How to Store
Fresh: let cool completely, then slice what you’re eating that day.
Freezer: freezes well with any of the toppings, no issues there. Store in a freezer-safe bag or container.
Nutrition
Per piece, 1/8 of the batch, dough only (does not include toppings). Estimated from the ingredients used – provided for convenience and not a substitute for a precise calculation.
255
Calories
53g
Carbs
7g
Protein
1g
Fat
2g
Fiber
540mg
Sodium
Desi’s Notes
My kitchen runs hot, usually 78 to 80 degrees, so the counter proof the next day moves fast for me. If your kitchen runs cooler, plan on it taking longer to get to that over-risen point.
Don’t be afraid to let this one go further than feels natural. I’m intentionally letting it more than double, that over-fermentation is where the big, open bubbles come from.
Press your fingers all the way down into the dough when you dimple it. You’ll see the fermentation bubbles shift and show through the surface, that’s exactly what you want.
I’ve frozen every topping combination I’ve tried on this one with no issues, so don’t hesitate to make a full dish and freeze what you don’t eat right away.
Before You Bake
Scaling this recipe up or down? Run your numbers through the Sourdough Calculator. And if you want a printable reference for troubleshooting or timing, browse all six Printable Quicksheets.
Knead to Know?
New recipes, baking tips, and sourdough troubleshooting — delivered before your starter even finishes its next rise.
Get the latest insights, no spam — just new recipes and baking tips. Unsubscribe anytime. See our Privacy Policy.




Tried this recipe? Leave a star rating below — it takes 10 seconds and helps other bakers decide what to make next.
Baked this recipe your way? Share it in Community Bakes and inspire other readers.